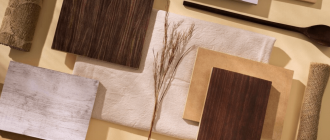
Choosing the Right Stains for Walnut Wood
Enhance the beauty of your walnut wood with the perfect stain.
Looking to give your walnut wood a fresh new look? Finding the right stain can make all the difference.
Walnut wood is known for its rich, warm tones and distinctive grain patterns. Whether you’re refinishing furniture, cabinetry, or flooring, choosing the right stain can highlight its natural beauty and bring out the best in your wood.
Here are some of the best stain options for walnut wood:
Benefits of Walnut Wood
Walnut wood is recognized for its exceptional qualities and is often preferred for various applications. Here are some of the significant benefits of using walnut wood:
1. Durability
One of the key advantages of walnut wood is its durability. It is a dense hardwood that is highly resistant to wear and tear. This makes it an excellent choice for furniture and flooring as it can withstand heavy use and last for many years.
2. Beautiful Grain
Walnut wood is renowned for its beautiful grain patterns, which add a touch of elegance and sophistication to any space. The wood has a rich, dark color with intricate patterns that vary from straight to wavy. It provides a visually appealing finish that can enhance the overall aesthetic of furniture and other wooden items.
In addition to its durability and attractive appearance, walnut wood has other benefits such as:
– Resistance to warping and shrinking
– Easy workability for woodworking projects
– Excellent dimensional stability
– Natural resistance to decay and insect infestations
All these qualities make walnut wood a highly sought-after material for various applications, including furniture, cabinets, flooring, and decorative items. Whether you’re looking for a reliable and long-lasting option or want to add a touch of elegance to your space, walnut wood is an excellent choice.
Factors to Consider Before Staining Walnut Wood
Before you stain your walnut wood, there are several factors you should consider to ensure the best results. These factors can have an impact on the final appearance and durability of your stained walnut wood.
Here are some key factors to keep in mind:
- Wood Condition: The condition of the walnut wood surface is crucial when it comes to staining. Ensure that the wood is properly sanded and free from any dents, scratches, or imperfections that could affect the stain absorption.
- Stain Compatibility: Not all stain types are suitable for walnut wood. It’s important to choose a stain that is specifically formulated for use on walnut wood to achieve the desired color and effect.
- Color Testing: Before applying the stain to the entire piece of walnut wood, it’s recommended to perform a color test on a small, inconspicuous area. This will allow you to determine if the selected stain color complements the natural tone of the walnut wood.
- Pre-Stain Conditioner: Walnut wood tends to absorb stains unevenly due to its natural grain patterns. Using a pre-stain conditioner can help minimize this issue by sealing the wood surface and promoting more uniform stain absorption.
- Applying Technique: The technique used to apply the stain can affect the final result. Whether you choose to brush, spray, or wipe on the stain, it’s important to follow the instructions provided by the manufacturer to ensure an even and professional-looking finish.
- Sealant: Applying a sealant or top coat after staining your walnut wood is essential to protect the stain and enhance its longevity. Choose a sealant that is compatible with the stain you’ve selected and follow the recommended application instructions.
By considering these factors before staining your walnut wood, you can achieve a beautiful and long-lasting finish that enhances the natural beauty of the wood.
Types of Stain for Walnut Wood
When it comes to staining walnut wood, you have several options to choose from. Different types of stains can enhance the natural beauty of the wood while providing varying levels of color and protection.
1. Oil-based Stains: Oil-based stains are a popular choice for walnut wood as they enhance the natural grain and color. They penetrate deeply into the wood, resulting in a rich and lasting finish. Oil-based stains are easy to apply and can be blended to achieve the desired color intensity.
2. Water-based Stains: Water-based stains are another option for staining walnut wood. These stains are eco-friendly and have low VOC (volatile organic compounds) content, making them a safer choice for both the user and the environment. Water-based stains dry quickly and are known for their vibrant and consistent colors.
3. Gel Stains: Gel stains are an excellent choice for walnut wood, especially if you want to achieve a thick and even finish. These stains have a gel-like consistency that allows them to sit on the surface of the wood rather than penetrating deeply. Gel stains are easy to control and can be used to create various effects, such as highlighting the grain pattern.
4. Spray Stains: If you prefer a more even and uniform finish, spray stains are worth considering. These stains are applied using a spray gun or aerosol can, ensuring a consistent application and avoiding brush marks. Spray stains can be quickly and evenly applied to larger surfaces, making them ideal for projects that require efficiency and speed.
5. Natural Stains: If you prefer to maintain the natural look of walnut wood, you can opt for natural stains. These stains are made from natural pigments and dyes, allowing the wood’s natural beauty to shine through while providing a layer of protection. Natural stains can be combined with other types of stains to create custom colors and effects.
In conclusion, when choosing a stain for walnut wood, consider the desired finish, the level of protection needed, and the application method to achieve the best results. Whether you prefer an oil-based stain for a traditional look or a water-based stain for an eco-friendly option, there is a stain out there that will enhance the beauty of your walnut wood.
Oil-Based Stains
When it comes to staining walnut wood, oil-based stains are a popular choice. They offer a deep and rich color that enhances the natural beauty of the wood. Oil-based stains are known for their excellent penetration into the wood, which helps to highlight the grain patterns.
Advantages of Oil-Based Stains
One of the main advantages of using oil-based stains on walnut wood is their durability. Once applied and dried, oil-based stains create a protective layer on the surface of the wood, making it resistant to wear and tear. This is especially beneficial for furniture or flooring that receives regular use.
Furthermore, oil-based stains provide a long-lasting color that doesn’t fade easily. The deep and vibrant hues achieved with oil-based stains can withstand exposure to sunlight, ensuring that the walnut wood maintains its beauty for years to come.
Tips for Using Oil-Based Stains on Walnut Wood
Before applying an oil-based stain on walnut wood, it is important to prepare the surface properly. Start by sanding the wood to achieve a smooth and even surface. This will help the stain to penetrate evenly and create a consistent color.
When applying the stain, use a clean cloth or brush, working in the direction of the wood grain. This will ensure that the stain is evenly distributed and enhances the natural patterns of the walnut wood.
After applying the stain, allow it to dry completely before applying any protective finish. This will give the stain time to fully penetrate the wood and set, resulting in a beautiful and long-lasting color.
Remember to follow the manufacturer’s instructions for drying times and additional coats, if needed, to achieve the desired color and finish.
In conclusion, oil-based stains are an excellent option for staining walnut wood. With their durability, long-lasting color, and ability to enhance the natural beauty of the wood, oil-based stains can transform any walnut wood project into a stunning piece of craftsmanship.
Water-Based Stains
Water-based stains are a popular choice for staining walnut wood due to their many advantages. These stains are made with water as the main solvent and contain pigments that penetrate the wood to add color. The water base in these stains allows for easy clean-up and low odor, making them a great option for those who prefer a more environmentally friendly option.
Advantages of Water-Based Stains
There are several advantages to using water-based stains on walnut wood:
- Easy Clean-Up: Since water-based stains are soluble in water, they can be easily cleaned up with soap and water. This makes the staining process much more convenient and less messy.
- Low Odor: Water-based stains have a low odor compared to oil-based stains, making them more pleasant to work with, especially in enclosed spaces.
- Fast Drying: Water-based stains dry much faster than oil-based stains, allowing for quicker project completion. This is especially beneficial for those who want to apply multiple coats or finish their project within a shorter timeframe.
- Non-Toxic: Water-based stains are generally non-toxic and safe for indoor use. They emit fewer volatile organic compounds (VOCs) compared to oil-based stains, making them a healthier option for both the environment and the individuals using them.
Application Tips for Water-Based Stains
When applying water-based stains to walnut wood, here are a few tips to achieve the best results:
- Preparation: Ensure that the wood surface is clean, dry, and free from any dirt or debris before applying the stain. Sand the surface if necessary to achieve a smooth finish.
- Test Stain: It’s always a good idea to test the stain on a small inconspicuous area of the wood before applying it to the entire surface. This will help you determine the desired color and ensure proper adhesion.
- Apply Evenly: Use a brush, sponge, or cloth to apply the stain in even, thin coats. Work with the grain of the wood for a smooth and even finish.
- Multiple Coats: Depending on the desired color intensity, you may need to apply multiple coats of water-based stain. Allow each coat to dry completely before applying the next one.
- Seal the Stain: Once the stain is dry, consider sealing it with a clear topcoat or finish to protect the wood and enhance the beauty of the stain.
Note: Always refer to the manufacturer’s instructions and follow proper safety precautions when working with water-based stains.
Water-based stains are a versatile and eco-friendly option for staining walnut wood. With their easy clean-up, low odor, and fast drying properties, they make the staining process more convenient and enjoyable. Follow the application tips for the best results and enjoy the rich and vibrant colors water-based stains bring to your walnut wood projects.
Gel Stains
Gel stains are a fantastic option for staining walnut wood, as they provide a smooth and even finish. Unlike traditional liquid stains that can penetrate too deeply into the wood and obscure the natural beauty of walnut, gel stains sit on the surface, allowing the rich tones and unique grain patterns to shine through.
One of the main advantages of gel stains is their ease of use. With their thick, gel-like consistency, they are easy to apply and control, making them perfect for both beginners and experienced woodworkers. The gel formulation prevents drips and splatters, ensuring a clean and precise staining process.
Advantages of Gel Stains:
1. Versatile Application: Gel stains can be applied using a brush, cloth, or foam applicator, making them suitable for a variety of projects and techniques. They can be used to create a uniform color or to enhance the natural variations in the walnut wood grain.
2. Deep Color Penetration: Gel stains have excellent coloring properties, allowing them to penetrate the wood deeply and enhance the natural warmth and richness of walnut. They can be layered to achieve a more intense color or diluted for a lighter shade, offering flexibility in achieving the desired look.
Tips for Using Gel Stains:
– Always test the gel stain on a small, inconspicuous area of the walnut wood before applying it to the entire surface. This will ensure that you achieve the desired color and finish.
– Apply the gel stain in thin, even coats, allowing each layer to dry fully before applying the next. This will prevent blotching and ensure a smooth and consistent finish.
– Use a clean cloth or brush to remove any excess gel stain after each coat. This will help prevent the stain from becoming tacky or sticky.
With their ease of use and excellent coloring properties, gel stains are an excellent choice for staining walnut wood. Whether you’re refinishing furniture, cabinetry, or other walnut wood projects, gel stains will enhance the beauty of the wood and create a long-lasting, durable finish.
Choosing the Right Stain Color
When it comes to staining walnut wood, choosing the right color can make all the difference in achieving the desired look for your project. The stain color you choose will impact the overall appearance of the wood, enhancing its natural beauty and highlighting its unique characteristics.
Consider the Wood’s Natural Color
Before selecting a stain color, it is important to take into consideration the natural color of the walnut wood. Walnut has a rich, deep brown color with dark chocolate undertones. This natural color can vary depending on the age and grade of the wood, as well as the way it was harvested and processed. By considering the wood’s natural color, you can choose a stain that complements and enhances its inherent beauty.
Test, Test, Test
It is always recommended to test different stain colors on a scrap piece of walnut wood before applying it to your project. This will give you a better understanding of how the stain will interact with the wood and allow you to see the final result. It is also important to keep in mind that the color of the stain may appear different on different types of wood, so testing is crucial to ensuring the desired outcome.
Light or Dark?
When it comes to choosing between light and dark stain colors, it ultimately depends on the desired look and the ambiance you want to create. Lighter stain colors, such as honey or golden oak, can give walnut wood a brighter and more vibrant appearance. On the other hand, darker stain colors like espresso or ebony can add depth and create a more dramatic and elegant look.
Consider the Style
Considering the overall style and decor of the space where the walnut wood will be used is also important when choosing a stain color. If you are going for a rustic or farmhouse style, a lighter stain color can help achieve that warm and inviting look. For a more modern or contemporary style, a darker stain can create a sleek and sophisticated feel.
Choosing the right stain color for walnut wood is a personal choice that depends on your individual preferences and the desired look you want to achieve. By considering the wood’s natural color, testing different stains, and taking into account the style of the space, you can select the perfect stain color to enhance the beauty of your walnut wood project.
Natural Walnut Stain
When it comes to enhancing the natural beauty of walnut wood, nothing can beat a natural walnut stain. This type of stain is specifically designed to accentuate the rich tones and unique grain patterns that walnut wood is known for. With a natural walnut stain, you can achieve a warm, inviting look that will complement any interior design style.
Benefits of Using a Natural Walnut Stain
1. Highlighting Grain Patterns: One of the main advantages of using a natural walnut stain is its ability to enhance the natural grain patterns of walnut wood. The stain penetrates deep into the wood, bringing out the intricate details and adding depth to the overall appearance.
2. Preserving Natural Color: Unlike some other types of stains that can alter the natural color of wood, a natural walnut stain preserves the beauty of walnut wood. It allows the natural hues to shine through while adding a subtle richness.
Applying a Natural Walnut Stain
Before applying a natural walnut stain, it is important to properly prepare the wood surface. Start by sanding the wood to smooth any imperfections and create a clean and even surface. Then, apply a pre-stain wood conditioner to ensure even absorption of the stain.
Once the surface is properly prepared, apply the natural walnut stain using a brush or a clean cloth, following the manufacturer’s instructions. Work in small sections, applying even coats and wiping off any excess stain. Allow the stain to dry completely before applying a protective finish.
Remember, the key to achieving the best results with a natural walnut stain is to take your time and work carefully. With patience and attention to detail, you can transform your walnut wood into a stunning masterpiece that showcases its natural beauty.
So, if you’re looking to enhance the natural beauty of walnut wood, consider using a natural walnut stain. With its ability to highlight grain patterns and preserve the original color, it’s the perfect choice for any project.
Dark Walnut Stain
If you are looking to add a rich, dark finish to your walnut wood, look no further than our Dark Walnut Stain. This stain option is perfect for those who want to enhance the natural beauty of the wood while adding a touch of elegance and sophistication.
Our Dark Walnut Stain is specially formulated to penetrate deep into the wood, ensuring a long-lasting and durable finish. It brings out the natural grain patterns and highlights the unique characteristics of walnut wood. The dark hue adds depth and warmth to any piece of furniture or flooring.
Whether you are working on a small DIY project or refinishing an entire room, our Dark Walnut Stain is easy to apply and dries quickly. It provides excellent coverage and is suitable for both indoor and outdoor use.
To achieve the desired darkness, apply multiple coats of our Dark Walnut Stain. Each coat will deepen the color, allowing you to customize the intensity to your liking. If you prefer a lighter hue, simply apply fewer coats or mix our stain with a lighter color.
Aside from its stunning appearance, our Dark Walnut Stain also offers protection against everyday wear and tear. It helps to prevent scratches, water damage, and fading caused by UV rays. This ensures that your walnut wood retains its beautiful finish for years to come.
| Benefits of our Dark Walnut Stain: |
|---|
| Enhances the natural beauty of walnut wood |
| Provides a rich, dark finish |
| Easy to apply and dries quickly |
| Offers protection against wear and tear |
| Suitable for indoor and outdoor use |
Choose our Dark Walnut Stain to transform your walnut wood into a luxurious masterpiece. Let its deep, dark color make a statement in your home or office. Order now and experience the beauty and durability of our premium stain option.
Light Walnut Stain
The light walnut stain is the perfect choice if you want to highlight the natural beauty of walnut wood while adding a subtle touch of elegance. It enhances the grain patterns and brings out the warm tones of the wood, creating a charming and inviting atmosphere.
With the light walnut stain, you can achieve a rustic yet refined look that complements various interior styles. Whether you have a modern or traditional space, this stain will add character and depth to your walnut wood furniture, floors, or other wooden surfaces.
Benefits of Light Walnut Stain:
1. Enhances natural beauty: The light walnut stain enhances the natural beauty of walnut wood by highlighting its unique grain patterns and warm tones.
2. Versatile: This stain works well with a variety of interior styles, from modern to traditional, making it a versatile choice for any space.
3. Creates a cozy atmosphere: The warm tones of the light walnut stain create a cozy and inviting atmosphere, perfect for relaxing or entertaining.
How to Apply Light Walnut Stain:
Applying the light walnut stain is a simple process that can be done in a few easy steps:
- Sand the wooden surface to remove any imperfections and create a smooth base.
- Apply the stain using a brush or cloth, following the direction of the wood grain.
- Wipe off any excess stain with a clean cloth.
- Allow the stain to dry completely before applying a protective finish.
Remember to always test the stain on a small, inconspicuous area before applying it to the entire surface to ensure that you achieve the desired color and effect.
| Stain Type | Color | Opacity | Drying Time |
|---|---|---|---|
| Light Walnut | Warm brown with golden undertones | Semi-transparent | Approximately 2 hours |
| Medium Walnut | Rich brown with red undertones | Semi-transparent | Approximately 4 hours |
| Dark Walnut | Deep brown with black undertones | Semi-transparent | Approximately 6 hours |
As you can see from the comparison table, the light walnut stain offers a warm brown color with golden undertones and a semi-transparent finish. It dries relatively quickly, allowing you to complete your project in a timely manner.
Choose the light walnut stain to bring out the natural beauty of your walnut wood and create a warm and inviting space that you’ll love for years to come.
Preparing Walnut Wood for Staining
Before you begin staining your walnut wood, it is important to properly prepare the surface. This will ensure that the stain takes evenly and creates a beautiful finish. Here are some steps to follow:
- Clean the wood: Start by removing any dust, dirt, or debris from the surface of the wood. Use a soft cloth or a vacuum with a brush attachment to gently clean the wood.
- Sand the wood: Next, sand the surface of the wood to create a smooth and even finish. Start with a coarse-grit sandpaper and gradually work your way up to a finer-grit sandpaper. Be sure to sand with the grain of the wood to avoid scratching the surface.
- Fill any gaps or holes: If there are any gaps or holes in the wood, use a wood filler to fill them in. Allow the filler to dry completely and then sand it smooth.
- Apply a pre-stain conditioner: Walnut wood can be prone to blotching when stained, so it is recommended to use a pre-stain conditioner. This will help to even out the absorption of the stain and reduce blotching. Follow the instructions on the conditioner and allow it to dry before applying the stain.
- Choose the right stain: Finally, choose the stain color that best suits your project and apply it according to the manufacturer’s instructions. It is recommended to test the stain on a small, inconspicuous area of the wood before applying it to the entire surface.
By following these steps, you can ensure that your walnut wood is properly prepared for staining and achieve the best results.
Sanding the Wood Surface
Before applying stain to walnut wood, it is important to properly sand the surface to ensure a smooth and even finish. Sanding helps to remove any imperfections and open up the wood’s pores, allowing the stain to penetrate more effectively.
Here are some key tips for sanding walnut wood:
1. Choose the Right Sandpaper Grit: Start with a coarse grit sandpaper, such as 80 or 100, to remove any roughness or blemishes. Gradually move to finer grits, such as 150, 220, and 320, to achieve a smoother surface.
2. Sand in the Direction of the Grain: Always sand along the natural grain of the wood to avoid creating scratches or uneven marks. Use long, even strokes and apply consistent pressure.
3. Remove Dust and Debris: After each sanding session, use a clean cloth or vacuum to remove any dust and debris from the surface. This will ensure a clean and properly prepared wood surface for staining.
4. Consider Using Sanding Sealer: For an extra smooth finish, you may choose to use a sanding sealer after sanding the wood surface. This will help fill in any remaining pores and provide a more uniform base for the stain.
5. Test the Stain: Before applying the stain to the entire wood surface, it is recommended to test it on a small, inconspicuous area. This will allow you to assess the color and ensure a satisfactory result.
By following these sanding tips, you can achieve a beautiful and professional-looking finish for your walnut wood project. Remember to always wear protective goggles and a mask when sanding to avoid inhaling dust particles.
Once you have completed the sanding process, you are ready to move on to the next step: applying the stain. Stay tuned for our next section on “Applying the Stain” to learn more about the best stain options for walnut wood.
Applying Pre-Stain Conditioner
Before staining walnut wood, it is important to apply a pre-stain conditioner. This will help ensure an even and smooth application of the stain, as well as enhance the overall appearance and durability of the final finish.
A pre-stain conditioner is especially useful when working with walnut wood due to its naturally uneven and porous grain. By applying a pre-stain conditioner, you can prevent the wood from absorbing the stain unevenly, resulting in blotches and streaks.
To apply the pre-stain conditioner, follow these steps:
1. Prepare the Wood:
Start by thoroughly sanding the walnut wood surface to remove any rough areas or imperfections. This will create a smooth and even surface for the conditioner to be applied.
2. Choose the Right Pre-Stain Conditioner:
There are various pre-stain conditioner products available on the market. It is important to choose one that is specifically designed for use with walnut wood. This will ensure proper compatibility and optimal results.
3. Apply the Conditioner:
Using a clean, lint-free cloth or brush, apply a generous amount of the pre-stain conditioner to the walnut wood surface. Make sure to work it into the grain evenly, ensuring every inch of the wood is covered with the conditioner.
4. Let it Penetrate:
Allow the pre-stain conditioner to penetrate the wood for the recommended amount of time specified by the manufacturer. This will typically range from 5 to 15 minutes.
5. Wipe off Excess:
After the recommended waiting time, use a clean cloth to wipe off any excess conditioner from the wood surface. This will help prevent excessive build-up and ensure a smooth application of the stain.
Once the pre-stain conditioner has been applied and excess has been wiped off, you can proceed with staining the walnut wood using the desired stain of your choice. The pre-stain conditioner will help the stain to penetrate more evenly and produce a more professional and attractive finish.
Remember to always follow the manufacturer’s instructions for both the pre-stain conditioner and the stain itself to achieve the best results.
By taking the time to apply a pre-stain conditioner, you can ensure that your walnut wood project turns out beautifully and lasts for years to come.
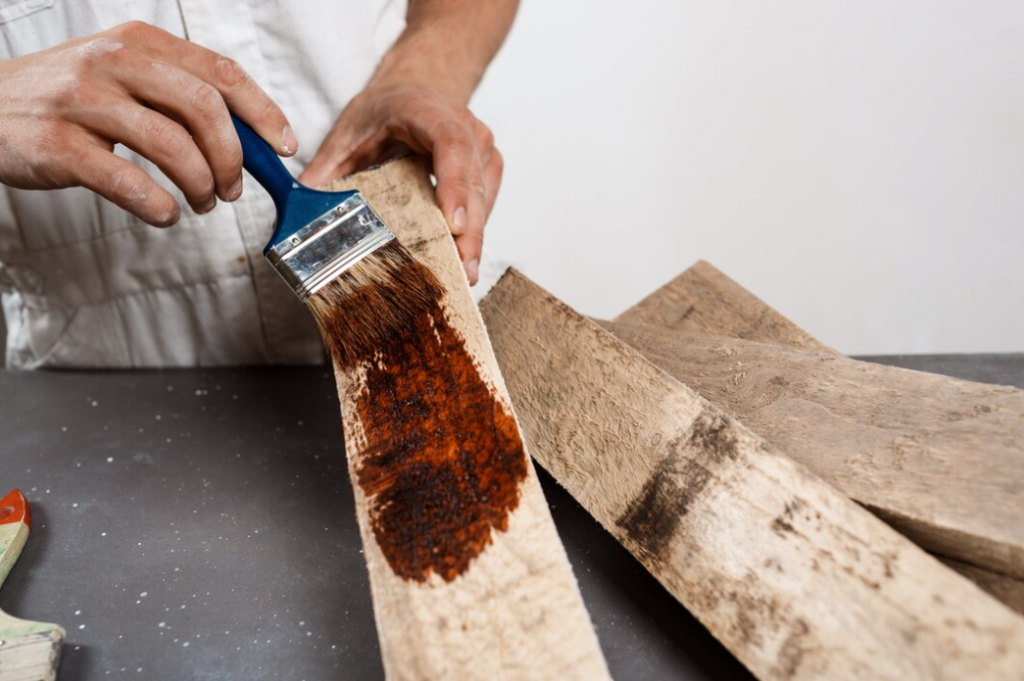
Applying Stain to Walnut Wood
Applying stain to walnut wood is a crucial step in enhancing its natural beauty and protecting its surface. The rich, deep color of walnut can be further enhanced with the right stain to create a stunning finish.
Before applying stain, it is important to prepare the walnut wood properly. Start by sanding the wood surface to remove any imperfections and to create a smooth and even texture. This will ensure that the stain is absorbed evenly and will result in a uniform color. Take care to remove any dust or debris from the surface after sanding.
Once the wood is properly sanded and cleaned, it is time to apply the stain. There are various options available when it comes to choosing a stain for walnut wood, including oil-based stains, water-based stains, and gel stains. Each type of stain offers different advantages and produces a unique finish.
| Stain Type | Advantages |
|---|---|
| Oil-Based Stains | Provide deep penetration for a rich and warm color. Can be easily blended for a custom shade. |
| Water-Based Stains | Dry quickly and have low odor. Offer vibrant color options and are environmentally friendly. |
| Gel Stains | Thicker consistency allows for controlled application and better color control. Ideal for vertical surfaces. |
When applying the stain, it is important to follow the manufacturer’s instructions carefully. Use a brush or a clean cloth and apply the stain in long, even strokes, following the grain of the wood. Make sure to apply an even coat of stain, avoiding any puddles or drips.
After applying the stain, allow it to penetrate the wood for the recommended amount of time. This will ensure that the color develops fully and evenly. Once the desired color is achieved, use a clean cloth to wipe off any excess stain and then allow the wood to dry completely.
Finally, to protect the stained walnut wood and enhance its durability, apply a clear topcoat or finish. This will seal the stain and provide protection against moisture, scratches, and UV damage. Choose a finish that is compatible with the stain and follow the manufacturer’s instructions for application.
By properly applying stain to walnut wood, you can bring out its natural beauty and create a finished product that is both visually stunning and long-lasting.
Brushing the Stain
Brushing the stain onto walnut wood is a popular method for applying the desired color and protecting the surface. It allows for more control and precision compared to other application techniques.
Before you start brushing the stain, make sure the wood surface is clean and free of any dust or debris. This will ensure a smooth and even application.
When choosing a brush for staining, opt for a high-quality bristle brush that is specifically designed for woodworking projects. The bristles should be soft and flexible to allow for better control and to prevent any streaks or brush marks.
Dip the brush into the stain and tap off any excess to avoid drips. Start applying the stain in the direction of the wood grain, using long and even strokes. Work in small sections to ensure that the stain is evenly distributed.
As you brush the stain onto the walnut wood, pay attention to any areas that may require additional coverage or blending. You can use a clean brush or a cloth to gently blend the stain and remove any excess or uneven spots.
Allow the stain to dry completely according to the instructions provided by the manufacturer. This may take anywhere from a few hours to overnight depending on the type of stain and the environmental conditions.
Once the stain is dry, you can apply a protective topcoat to enhance the durability and longevity of the finish. Choose a clear varnish or polyurethane that is compatible with the stain you used.
Remember to always follow the manufacturer’s instructions for staining and finishing products. With careful brushing and proper application techniques, you can achieve beautiful and long-lasting results on your walnut wood projects.